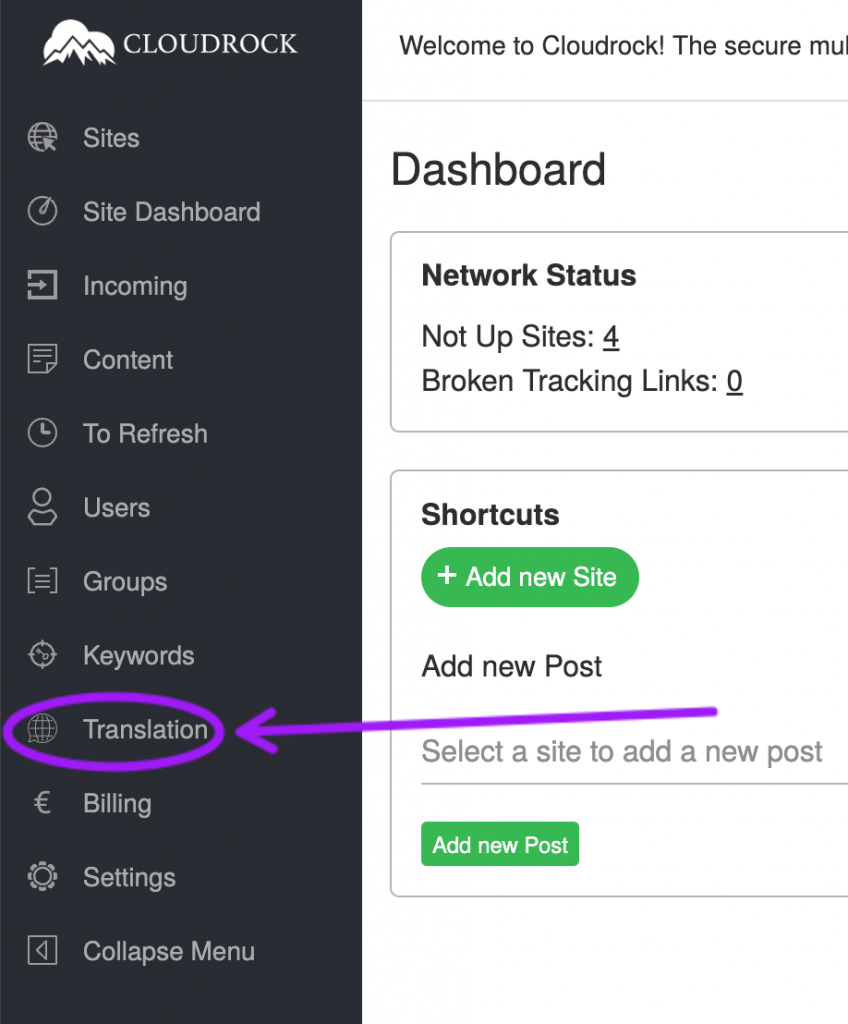
Step 1. click on Translation in the left menu.

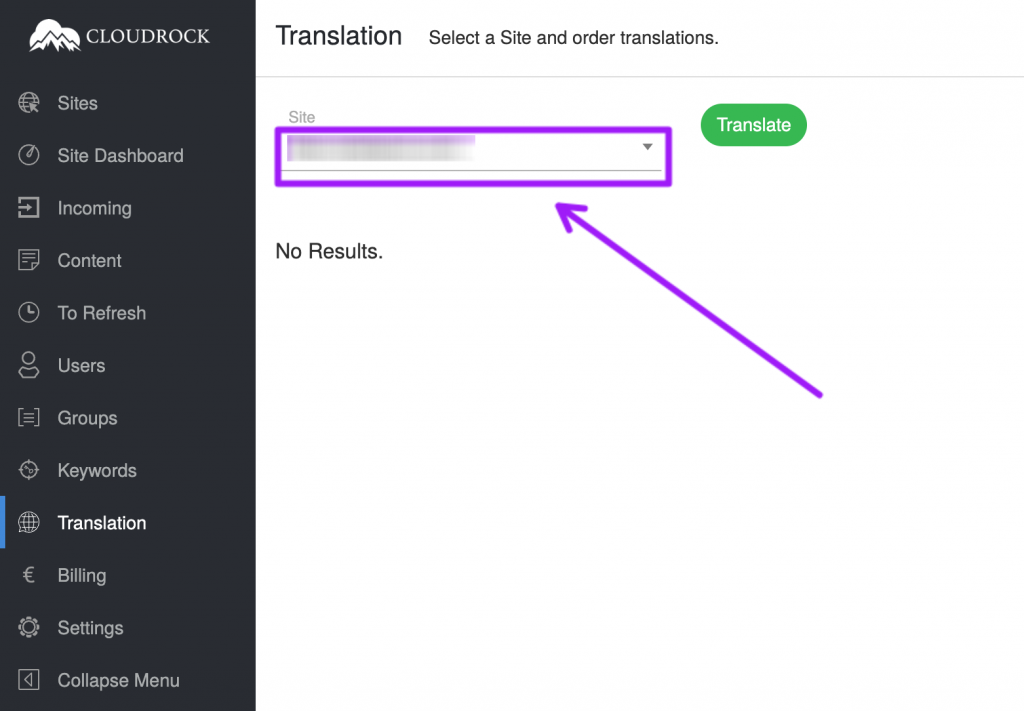
Step 2. Select Site in the dropdown menu

When selecting a site, you will be shown a list of posts that can be translated.
If the list shows “No Results” the site either has no Posts or (more likely) you haven’t set up multiple languages for the site. Go to the guide on how to set up additional languages and finish that step first. You also might want to read the guide on how to set up local versions of each category.
Step 3. Select which posts you want to translate
The list will show you all posts that doesn’t have translations for all languages. This means that the list will only show the Posts that are missing a translation in at least one language.
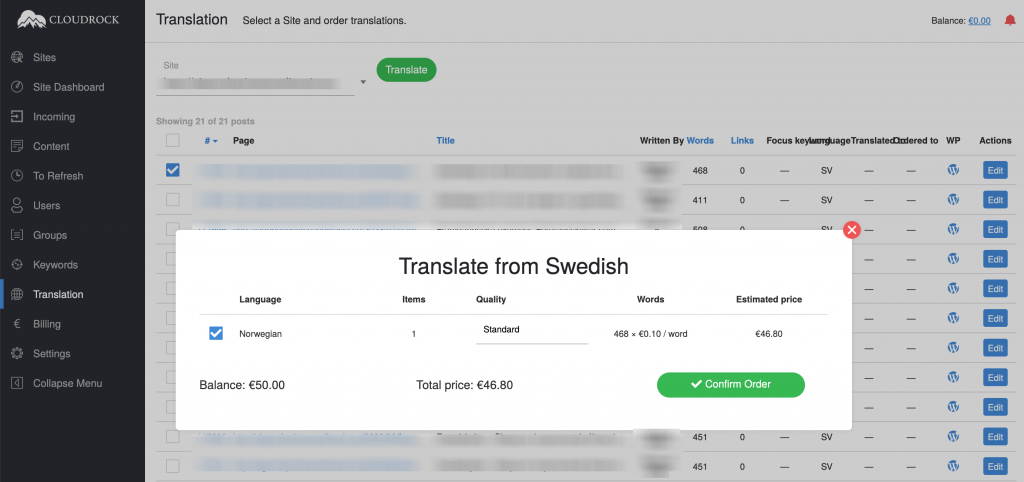
Select the posts you want to translate by marking their checkboxes. Then click the Translate button.

You will then see a menu with different options and the cost to translate.
Step 4. Select which translation option you want and click “Confirm Order”

If you have enough balance in your account the “Confirm Order” button will be green and you can click it.
The translated Posts will be added to your website automatically.
Below you can read about the different translation options.
The following translation options exist
Standard
The text is translated by a human and then proofread by a human.
Business
The text is translated by a human, proofread by another human and then quality checked by a third human. This is the most expensive option.
Machine
The text is machine translated. This is the cheapest and fastest option. You will have the translations almost immediately.
Hybrid
The text is first machine translated and then proofread by a human.
